Stereograms (two images side by side) will be in full color. Anaglyphs (needing red/cyan glasses) will be in greyscale, but some colors like yellow can be used. This module allows creation of stereograms either in parallel or cross-eyed mode.
The cross-eyed flag simply flips the image pair left-for-right. If the mountains look like valleys to you, or considerable eye strain is needed to obtain a 3D effect, try using this flag. 3D image cognition is not universal among individuals, some trial and error may be needed to create an image that works well for you.
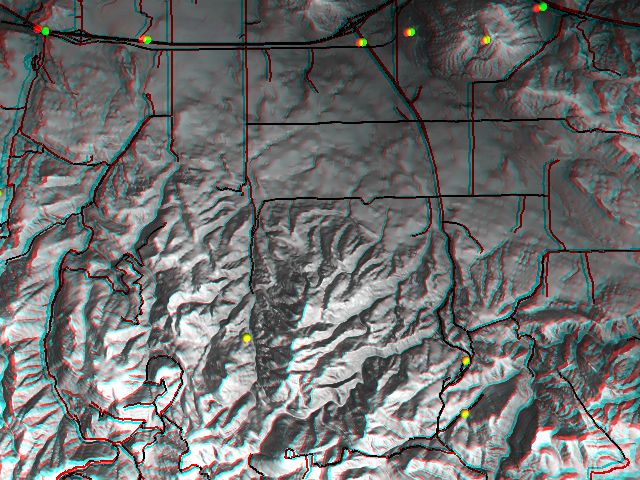
If draping a color_overlay raster map over the top of a DEM in anaglyph mode, it works best to first change the color map of the overlay raster to greyscale or sepia with the r.color module (perhaps with the -e flag), to prevent any red/cyan in the overlay's color table from confusing the 3D effect.
The flatten terrain and equalize contrast flags only operate in anaglyph mode. The equalize contrast flag only applies to the base DEM and will not have an effect if a color_overlay raster map is used.

For standard stereograms to be viewed with a stereoscopic viewer the -g flag will overlay middle-of-image fiducial marks for easier alignment.
For "free-view" stereograms, the -g flag helps guide your eyes by
adding instructions and two white dots to focus on. In parallel viewing
mode (the default) it will be hard to focus the dots if they are more
than the width of your eyes appart, in this case it is recommended to not
set the image size of each pane any greater than about 180 or 200
pixels, so the two panes look like bookmarks. The narrower the image the
easier it will be to focus on, but the less you will be able to see.
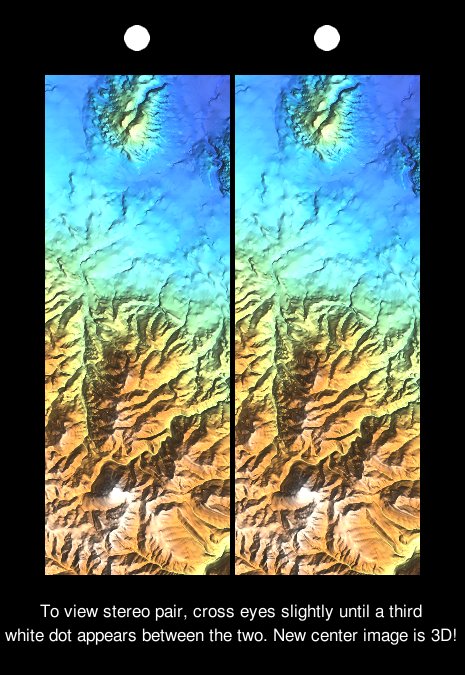
Cross-eyed free-viewing allows for observing full-width images, but it may take a bit more practice to master the technique: hold your finger up mid-way between your nose and the image in front of you, and while focusing on it try to get the two images in the background to overlap. When they do try to lock in on the central image in the background instead of your finger without altering your eyes' focus.
g.region rast=elevation
d.anaglyph input=elevation output=wake_anaglyph.png size=1280,960 \
   vlines=roadsmajor vpoints=schools_wake
g.region rast=elevation.10m
d.anaglyph -e input=elevation.10m output=spearfish_anaglyph.png \
   size=1280,960 z_exag=1.5 vlines=roads vpoints=archsites
g.region rast=elevation.10m
r.colors -e elevation.10m color=haxby
d.anaglyph -g input=elevation.10m output=spearfish_stereogram.png \
   style=freeview size=185,500 viewing_height=27000
Last changed: $Date$